 Australia
 Austria
 Belgium (Dutch)
 Canada (English)
 Denmark
 Estonia
 Finland
 France
 Germany
 Ireland
 Italy
Italy
 Luxembourg (French)
 Netherlands
 New Zealand
 Norway
 Poland
 Portugal
 Romania
 Singapore
 Spain
Spain
 Sweden
 Switzerland (French)
 USA
USA
 United Kingdom
 Other Countries


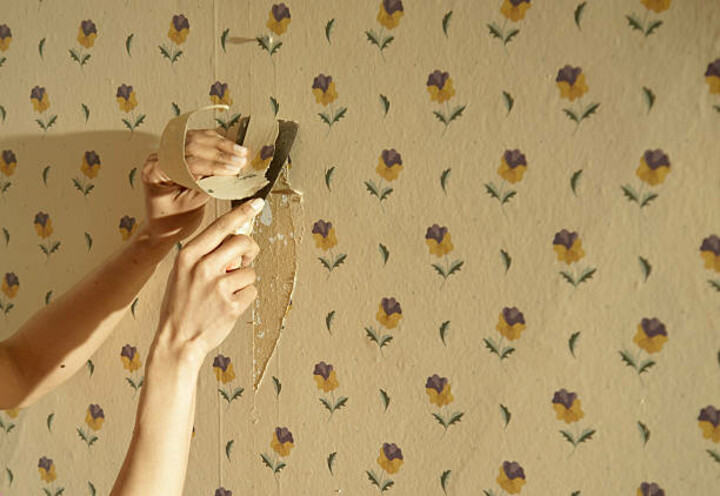
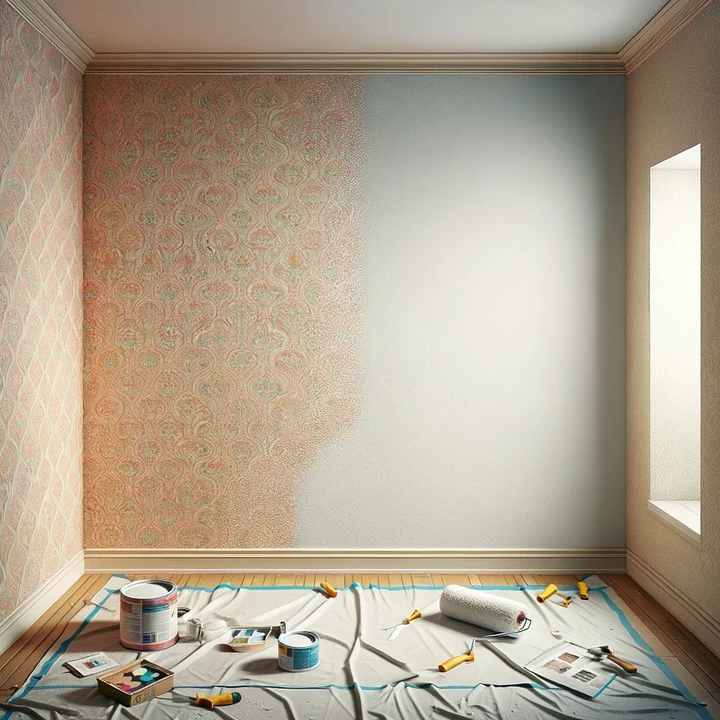
Many homeowners wonder how to remove wall mural from drywall without damaging the surface beneath. By understanding the difference between drywall and plaster, taking preliminary precautions, and employing tried-and-tested methods, you can successfully rid your wall of old wall mural and prepare it for a fresh new look. Let's dive into the process.
Drywall vs. Plaster: What's the difference?
Ultimately, drywall and plaster are commonly used wall finishes. While plaster is an older technique involving layers over wooden laths, drywall consists of gypsum plaster panels pressed between sheets of paper.
When it comes to removal or alterations, their differences are pronounced. Being thicker and more robust, plaster walls tend to resist damage, allowing more leeway when stripping off wallpapers or murals. On the contrary, the softer nature of drywall makes it prone to damage when using scrapers or tools. This sensitivity necessitates a gentler approach to mural or adhesive removal on drywall. Awareness of these distinctions ensures that you pick the right removal technique, and this guide will specifically assist those with drywall.
Preliminary steps: Things to do before removing the wall mural from the drywall
Before you begin removing your wall mural, it's essential to prepare the area and gather all the necessary tools and materials. Proper preparation will ensure that the removal process is smooth and damage-free.
Step 1: Clear the area
Ensure that the space around the mural is clear of any furniture or decor items. Lay down a plastic sheet or old newspapers on the floor to catch any debris or dripping water during the removal process. This will also help in a quick cleanup afterward.
Step 2: Ensure proper ventilation
It's crucial to have proper airflow in the room where you're working. Removing the wall mural may require the use of solvents or solutions that can release fumes. Open windows and doors to allow fresh air in, and consider using fans to promote circulation. Good ventilation not only ensures that any chemical fumes dissipate quickly, but it can also help speed up the drying process if water or steam is used.
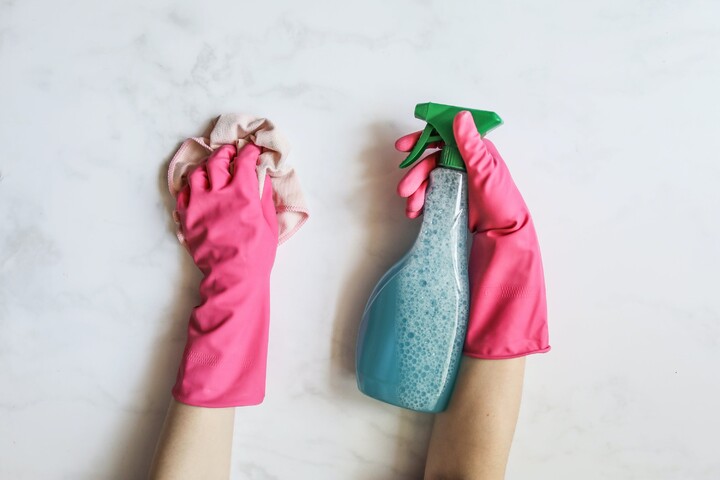
Step 3: Consider personal safety
Safety should always be a priority when working on home projects. When dealing with mural removal, there could be dust, small debris, or chemical splashes. Protect your eyes by wearing safety goggles. Gloves can also be beneficial, especially if you're using solvents or if you have sensitive skin that could be irritated by the adhesive or cleaning solutions. Furthermore, as you might be working near electrical outlets, even if the power is turned off, always ensure you're not standing in water or have wet hands when touching them.
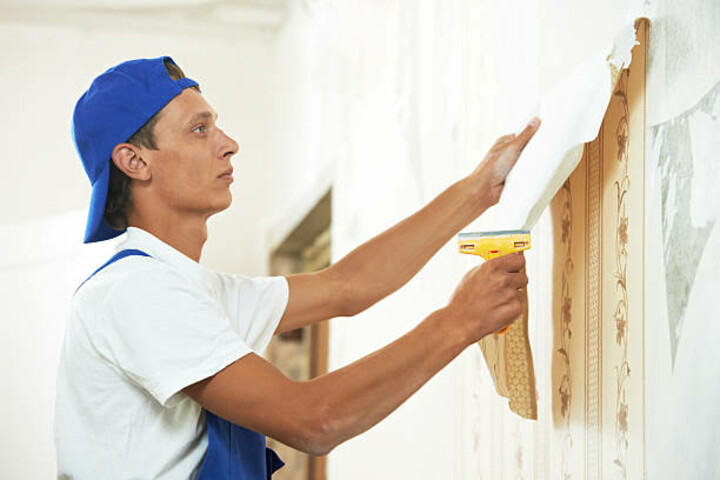
Methods of removing the wall mural from drywall
Different types of wall murals adhere to drywall in various ways, leading to multiple removal methods. Here, we’ll discuss two popular and effective techniques to ensure you achieve the best results without causing harm to your walls.
1st method: Steam removal
Using steam to soften the adhesive is a tried and tested method for removing wall murals from drywall without using chemicals. This method is preferred when aiming for a chemical-free approach and when the mural has been applied using a water-soluble adhesive.
Things you will need
• Wallpaper steamer
• Scraper
• Bucket of water
• Sponge or soft cloth
Easy-to-follow steps
Taking a methodical approach ensures you remove the mural efficiently without damaging the drywall underneath.
Step 1: Prepare the steamer
Fill the wallpaper steamer with water and turn it on. Wait until it heats up and starts producing steam. Ensure you read the manufacturer’s guidelines for your specific steamer.
Step 2: Start with a corner
Begin at the top corner of the mural. Place the steamer pad against the wall, holding it for about 20-30 seconds. This will soften the adhesive behind the mural.
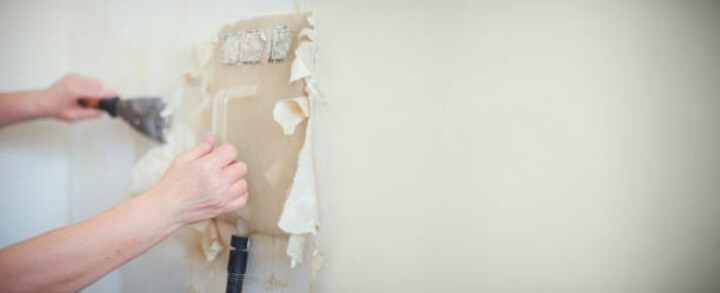
Step 3: Gently scrape away
After steaming a section, gently use your scraper to peel off the mural. Ensure you're moving the scraper in a direction away from you to avoid any accidents.
Step 4: Repeat
Continue this process, moving systematically down the wall, then side to side. It's essential to steam and scrape in manageable sections to ensure the adhesive remains soft as you work.
Note: If the mural isn’t coming off easily, you may need to steam the area a bit longer.
2nd method: Liquid wallpaper stripper solution
The application of a liquid wallpaper stripper solution helps in breaking down the adhesive properties of wall murals, easing their removal from drywall. This method is beneficial when dealing with stubborn, non-water-soluble adhesives or older wall murals.
Things you will need
• Liquid wallpaper stripper (available at home improvement stores)
• Sponge or cloth
• Spray bottle (for easy application)
• Putty knife or scraper
• Bucket of warm water
Easy-to-follow steps
For a seamless experience, follow these simple steps to use the liquid wallpaper stripper solution.
Step 1: Prepare the solution
Mix the liquid wallpaper stripper as per the manufacturer's instructions. Typically, this involves diluting the solution with a certain amount of warm water.
Step 2: Apply the solution
Fill the spray bottle with the prepared solution. Spray generously onto the wall mural, ensuring even coverage. Allow it to sit for the time specified on the product's label, usually 15-20 minutes.
Step 3: Begin peeling
After the waiting period, start at a corner or edge of the mural and gently peel it back. If it doesn't come off easily, use the putty knife or scraper to aid in the removal, but do so gently to avoid damaging the drywall.
Post-care guide: Things to do after removing wall mural from drywall
After the hard work of removing a wall mural from your drywall, it's essential to take the right post-care steps. Proper post-care not only ensures the longevity and health of your walls but also preps them for any subsequent treatments or decorations.
• Ensure thorough drying: Before you proceed with painting or applying another mural, make sure the wall is entirely dry. This is crucial to prevent issues such as mold or paint peeling in the future.
• Inspect for damages: Removing murals can sometimes result in minor scratches or dents on the drywall. Inspect the wall closely and patch up any visible damages with joint compound or spackling paste.
• Prime before painting: If you're planning to paint the wall, always start with a good quality primer. This not only ensures better paint adhesion but also gives a smoother finish.
• Remove remaining adhesive: Even after cleaning, some glue might remain. Place a piece of clear tape on the wall; if it sticks aggressively, there might still be residue. Clean the area again, or consider using an adhesive remover. Here’s a complete guide on removing wall mural glue.
• Ventilate the room: Especially if you've used chemicals or wallpaper stripper solutions, ensure the room is well-ventilated for at least 24 hours after the procedure. This helps in getting rid of any lingering fumes and speeds up the drying process.
Frequently asked questions
Diving into the intricacies of wall mural removal can lead to a myriad of questions. Here are some of the most commonly asked queries and their answers to guide you further.
Can you use a hairdryer when removing wall murals from drywall?
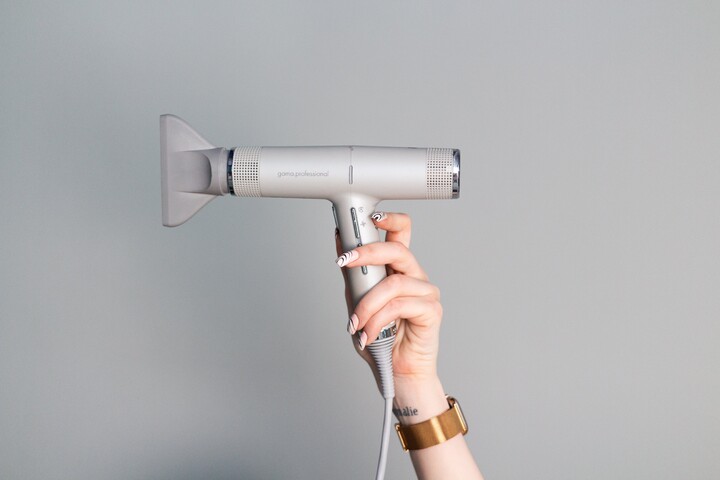
Yes, the heat from the hairdryer can soften the adhesive behind the mural, making it easier to peel off. When using this hairdryer, start at a corner and apply heat while gently lifting the mural with a scraper or your hand. However, be cautious, as excessive heat can damage the drywall or paint underneath.
Is it necessary to hire a professional to remove the wall mural from the drywall?
The need for a professional largely depends on the type of wall mural you have. If you want to make future removal easy, it’s best to choose peel-and-stick and non-woven types. Photowall offers these types of wall murals that are DIY-friendly as they are easy to install and remove.
However, beyond the type of mural, the priming done before the mural was applied is also crucial. Properly primed walls can make the removal process smoother, while poorly or unprimed walls can lead to more challenges. If you're unsure about the process or encounter stubborn areas, consulting a professional may be a good idea.
Can I paint over the wallpaper instead of removing it?
Painting over a wall mural or wallpaper can be feasible, but it's contingent on various factors. The texture of the wall mural, its condition, and whether it has a sealed surface are all crucial considerations. While smooth, undamaged surfaces are typically easier to paint over, a sealed or glossy mural might necessitate a high-bonding primer or a mild sanding with fine-grit sandpaper to create a receptive surface for paint. For a more detailed exploration of this topic, consider reading this article: How to paint over wall murals
What is the best method for removing stubborn wallpaper adhesive?
For obstinate wallpaper adhesive, a mixture of hot water and a few drops of dish soap can be effective. Saturate a sponge or cloth with the mixture and gently rub it onto the adhesive. Allow it to sit for a few minutes, softening the glue, before using a scraper to remove it. If this doesn't work, there are commercial adhesive removers available that can be more potent. Always remember to test any solution in a small, inconspicuous area first to ensure it doesn't damage the wall or its finish.
Successfully removing a wall mural from drywall requires a blend of knowledge, patience, and the right techniques. With this comprehensive guide, homeowners can confidently tackle the task and achieve a pristine wall surface, ready for their next design endeavor. Remember, preparation and post-care are just as essential as the removal process itself. With proper steps and precautions, you can ensure damage-free and efficient mural removal, rejuvenate your living space, and pave the way for your next home décor project.
If you’re ready for a new look, here’s a guide on choosing a new wall mural for your room: How to choose wall murals