 Australia
 Austria
 Belgium (Dutch)
 Canada (English)
 Denmark
 Estonia
 Finland
 France
 Germany
 Ireland
 Italy
Italy
 Luxembourg (French)
 Netherlands
 New Zealand
 Norway
 Poland
 Portugal
 Romania
 Singapore
 Spain
Spain
 Sweden
 Switzerland (French)
 USA
USA
 United Kingdom
 Other Countries


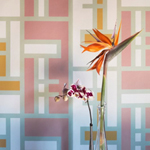

Create inspiring walls with stencils
Wall stencils are a great way to add flare to any wall. They appear great and add personality to dull and boring walls. This can be used to personalize any room and you can create a stylish accent wall with it as well. Commonly, wallpaper is used to make the walls of the room attractive and stylish. However, due to some complications in installing it, many homeowners prefer the use of stencils. There are actually countless possibilities in making the walls beautiful with the use of stencils. In addition to making a difference in the home interior, doing something creative like decorating the wall can be a self therapy that can make you a happier individual. Stenciling can make you feel less anxious, boost your self esteem, make you feel a sense of accomplishment and reduce stress.
How to make wall stencils in very easy ways
It is a fact that decorating your home can sometimes be costly and time consuming. If you are tight on budget, there are many other ways to make your home attractive without spending that much. What you need are to improvise some necessary materials, resourcefulness, creativity and imagination. If you want, you can consult different references so that you will be able to get some inspirations.
When it comes to wall stencils, you can easily create your very own focal wall if you have the right tools and patience. This DIY project is easy to accomplish and very rewarding.
Here are some easy steps in making your wall stencils and rest assured that you will love this DIY project:
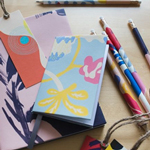
1. Choose your stencil pattern. The very first step to make your own wall stencil is to pick out your pattern. You can also draw your own pattern if you want to. Check the internet as well to look for patterns and have them printed to be used in your project.
If you are new to this project, try to pick simple patterns rather than the complicated ones.
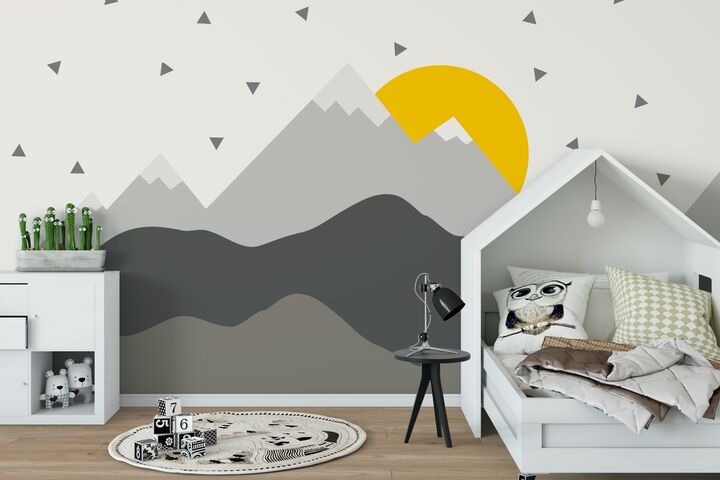
2. Select your paint color. There are no strict rules when it comes to paint color. You can choose any hues and stark contrast such as black in a white wall. Go vibrant with accent color or a soothing jewel tone.
3. Measure your space. Do not forget to measure your space before you start painting the stencil onto it. This is to ensure that the pattern will definitely fit on the wall. If you are planning to repeat the pattern, measure out how many times your chosen image will fit across the wall.
4. Wall preparation. Before doing anything on the wall, be sure to clean it. Paint would not stick to moisture, dust, or other impurities on the wall. If there are any holes or any other wall imperfections, repair them first. Remove any wall art, light switch covers or anything that you co not want to be painted.
5. Prepare the materials that you will be needing. You will be needing the following materials for your DIY stencil project: stencil sheets, marker to trace the pattern, measuring tape, cutting mat, exacto-knife, adhesive spray, masking tape, painter’s tape, paint, brush or paint sprayer.
6. Make your own stencil. After gathering all the supplies that you need, then it is time to actually do the project. Trace the pattern carefully. Use a ruler so that you will be able to create straight lines. Cut out the design and if your design requires painting a large space, make several stencil sheets and tape them together.
7. Practice first. Make sure that you are comfortable in using the stencil in terms of placing and removing them. Practice on a piece of cardboard or other disposable supply. Also, test how the stencil sticks to the wall. Spray adhesive on the back of the stencil to make it tacky enough to temporarily seal to the wall. Once the stencil are set, paint the color.
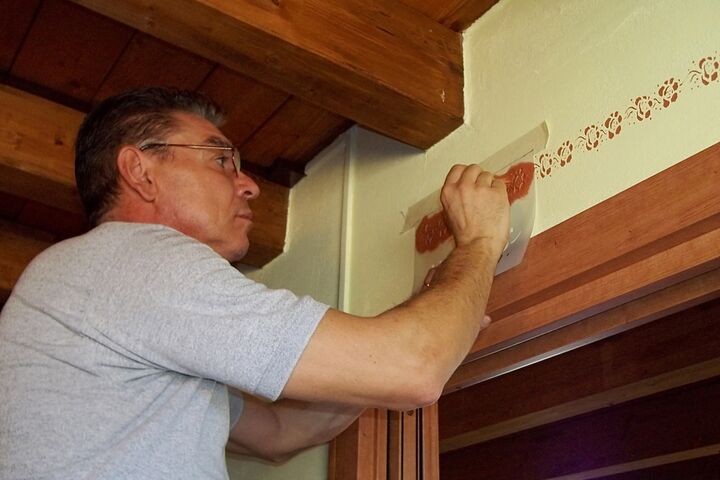
8. Stick your stencil to the wall. Mount the stencil to the wall. Be sure that it is level and then tape the edges down to the wall.
9. Time to paint. You can use the following in painting: paint sprayers, roller, sponge brush, brush. Be sure to cover the areas you do not want to be painted. Use the paint in moderation to avoid drips or messing the design. After completing the paint, carefully remove it and move to the next spot.
10. Repeat. For repeating patterns, check for any paint on the back of the stencil and wipe it off. Place the stencil in the new position and secure it to the wall. Repeat until you have successfully achieved your goal.
Happy decorating!