 Australia
 Austria
 Belgium (Dutch)
 Canada (English)
 Denmark
 Estonia
 Finland
 France
 Germany
 Ireland
 Italy
Italy
 Luxembourg (French)
 Netherlands
 New Zealand
 Norway
 Poland
 Portugal
 Romania
 Singapore
 Spain
Spain
 Sweden
 Switzerland (French)
 USA
USA
 United Kingdom
 Other Countries


To know how to fix wall mural seams, we’ll comprehensively discuss all the common wall mural wallpaper problems, including loose seams, air bubbles, wall mural discoloration, peeling edges, visible gaps in seams, wrinkles or creases, and trapped foreign objects. And, because we know that home decoration doesn't stop at repairs, we've dedicated a section to answering the most frequently asked questions on wall mural repairs and some final tips to help you along the way.
How to reattach loose wall mural seams
Wall mural seams are often the first problem homeowners encounter, and its disruptive nature can throw off the entire aesthetic of the mural. So, let’s start with this particular issue.
Common causes of loose wall mural seams
• Aging: Over time, wall murals might experience loose seams as the glue wears out.
• Improper installation: The wallpaper wasn't applied correctly, or the seams weren't pressed down adequately during installation.
• Low-quality adhesive: The glue used was either of poor quality or has aged and lost its adhering properties.
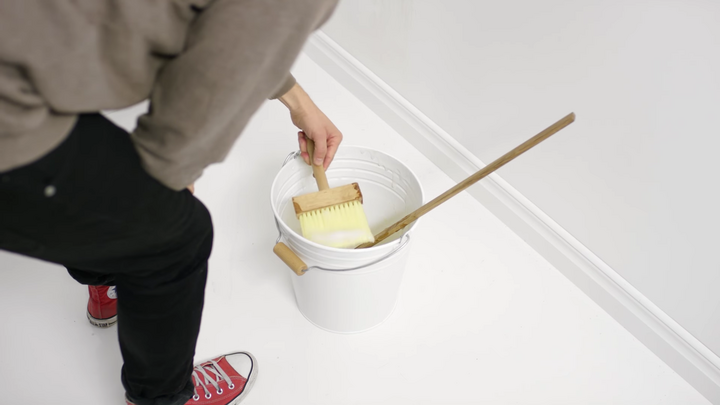
Things you will need to repair loose seams
• Wallpaper adhesive or seam repair glue
• Small paintbrush or putty knife
• Damp cloth
• Roller or wallpaper smoother
Easy-to-follow repair guide
1. Clean the area: Start by gently cleaning around the loose seam to ensure no dust or debris gets in the way.
2. Lift the loose seam: Gently lift the loose part of the wallpaper to access the area beneath.
3. Apply adhesive: Use the paintbrush or putty knife to apply a thin layer of the wallpaper adhesive under the lifted seam.
4. Press down: Carefully press the wallpaper back into place, ensuring no air bubbles form beneath.
5. Roll or smooth out: Use the roller or wallpaper smoother to press the seam down firmly, ensuring it adheres properly to the wall.
6. Clean excess adhesive: If any adhesive oozes out from the seam, wipe it away immediately using a damp cloth.
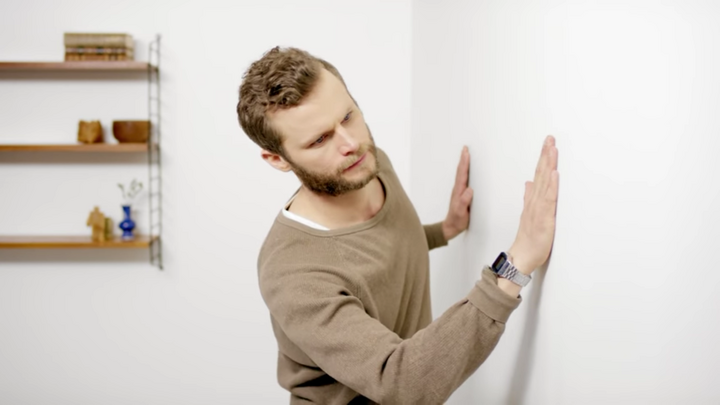
How to get bubbles out of wall mural
Even a few bubbles can become an unsightly distraction, especially if they're located in the focal points of the mural. Fortunately, removing these pesky bubbles is achievable with the right tools.
Common causes of air bubbles
• Wall imperfections: Bumps or debris on the wall surface can lead to air pockets when the mural is applied.
• Adhesive issues: Uneven spread of glue or using too much can lead to air bubbles.
• Improper installation: Bubbles can form if air is trapped between the wall and mural during installation.
• Environmental factors: Changes in temperature or humidity can cause the wallpaper to expand or contract, forming bubbles.
Things you will need to remove air bubbles
• Sharp utility knife or pin
• Wallpaper smoother
• Damp cloth
Easy-to-follow repair guide
1. Locate and puncture: Identify the bubble's center and gently puncture it with the utility knife or pin, careful not to tear the mural.
2. Press out air: Starting from the center where you made the puncture, press outwards to release the trapped air, using the wallpaper smoothly.
3. Smooth the area: Ensure the mural adheres properly to the wall without any creases or wrinkles.
4. Clean up: Wipe away any excess adhesive that might be squeezed out using the damp cloth.
How to address wall mural discoloration
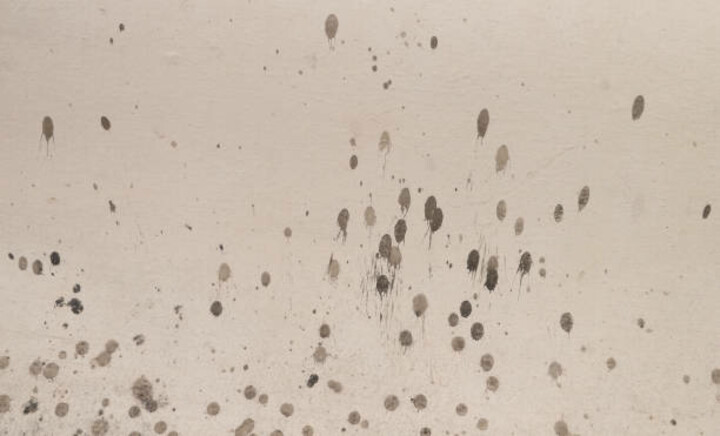
To maintain the mural's striking appearance and vibrancy, it's vital to understand the root causes of discoloration and implement effective preventive strategies. Learn them in this section.
Common causes of wall mural discoloration
• Prolonged sun exposure: Direct and persistent exposure to UV rays can fade the mural's vibrant colors.
• Chemical reactions: Some cleaning products or environmental pollutants can adversely affect the mural's colors, leading to discoloration. That’s why it’s essential to know how to clean your wall mural based on its material with this guide: How to clean a wall mural
• Moisture and mildew: High humidity or water intrusion can instigate discoloration, especially if mildew forms.
Things you will need to address discoloration
• Soft sponge or cloth
• UV protective spray or window films (to ward off the harmful effects of prolonged sun exposure)
• Mildew remover (if mildew is the cause of discoloration)
An easy-to-follow guide to protect and restore color
1. Surface cleaning: If the discoloration seems like surface dirt or light stains, gently cleanse the area with a damp, soft sponge or cloth.
2. Address mildew: In cases where discoloration results from mildew, apply a mildew remover following the product's guidelines.
3. UV protection: To proactively guard against color fading due to sunlight, think about using UV protective sprays or, if possible, install UV-blocking window films. Alternatively, just buy wall murals resistant to sunlight fading like the ones from Photowall.
Prevention is the most effective approach to discoloration, as it's challenging to restore a mural's lost vibrancy and faded details once they've diminished. Therefore, opting for sunlight-resistant wall murals, like those offered by Photowall, is a wise choice. Their non-woven murals are designed to resist fading from sunlight, guaranteeing enduring beauty for your walls.
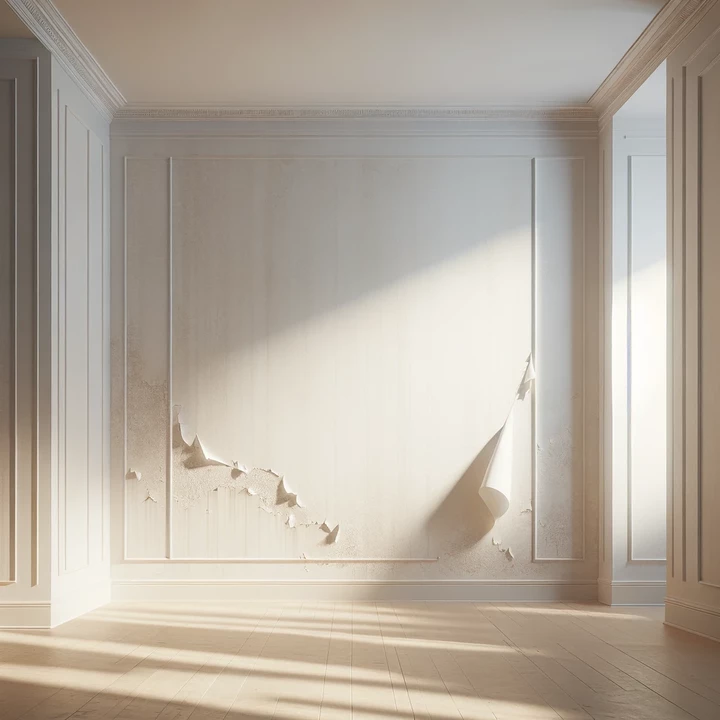
How to fix peeling wall murals
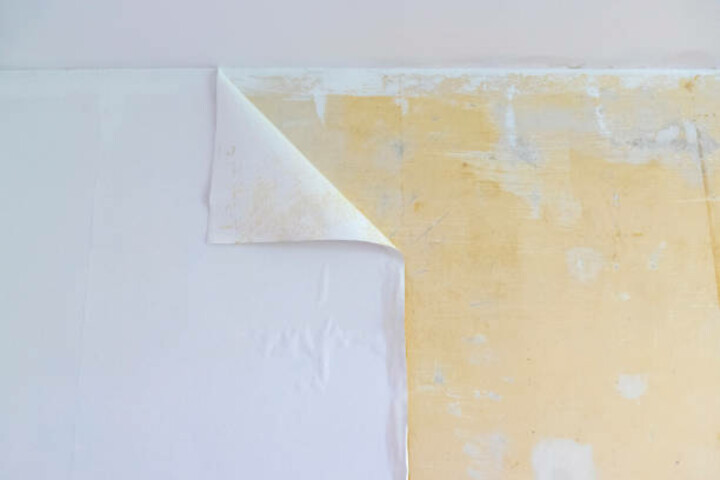
Wall murals serve as aesthetic focal points in our interiors, but their visual charm is compromised when they start peeling. Let’s delve into the reasons behind peeling and a systematic approach to fixing it.
Common causes of peeling wall murals
• Mural overstretching: Stretching the mural excessively during installation can cause it to peel later.
• Inadequate wall preparation: Walls that aren't cleaned or primed adequately can lead to murals that don't adhere properly.
• Low-quality adhesive: Inferior glues may not ensure a durable bond between the mural and the wall.
• Environmental influences: Changes in temperature and humidity levels can result in peeling.
Things you will need to fix peeling wall murals
• Wallpaper adhesive or glue
• Putty knife or scraper
• Soft sponge or cloth
• Roller or wallpaper smoother
Easy-to-follow repair guide
1. Surface preparation: Clean the area around the peeling section, ensuring it's free from dust or debris.
2. Lift and apply adhesive: Use the putty knife to gently lift the peeling section and spread a liberal adhesive on its back.
3. Reattachment: Press the section back onto the wall, employing the roller or wallpaper smoother to ensure a snug fit without bubbles.
4. Clean up: Any excess glue on the mural's surface should be carefully wiped using a sponge or cloth.
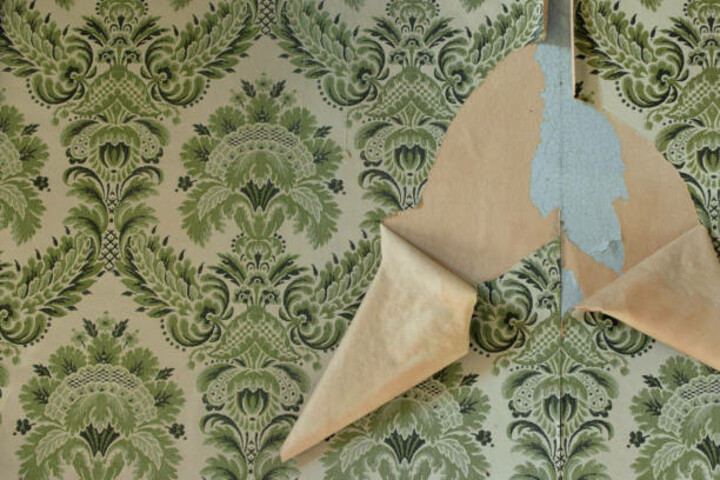
How to hide visible gaps in wall mural seams
Visible gaps in wall mural seams can disrupt its continuous design, making the defects noticeable. Recognizing the reasons for these gaps and the repair process can preserve the mural's visual coherence.
Common causes of visible gaps
• Shrinkage: Some wallpapers may contract slightly over time, leading to visible gaps.
• Misalignment: Incorrect alignment during the mural's installation can result in gaps.
• Overlap issues: Insufficient overlap during the mural's application can cause gaps.
Things you will need to hide visible gaps
• Seam filler or wallpaper seam repair adhesive
• An artist's brush or a small paintbrush
• Damp cloth
• Wallpaper roller
Easy-to-follow repair guide
1. Area preparation: Clean around the gap, ensuring a debris-free surface for repair.
2. Filler application: Add the seam filler or adhesive into the gap with the artist's brush.
3. Seam pressing: Bring the gap's edges together, employing the wallpaper roller for a firm fit.
4. Cleanup: A damp cloth should remove excess adhesive on the mural.
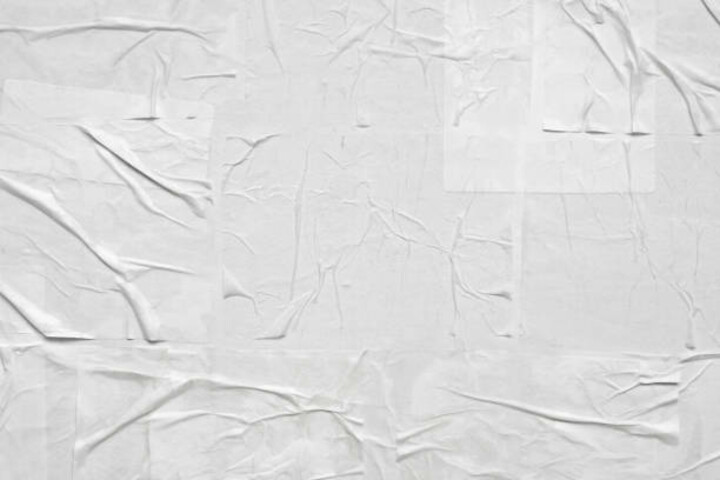
How to fix wrinkling or creasing wall murals
Wall murals are meant to provide a smooth visual experience, but wrinkles or creases can mar this effect. Swift actions can ensure that your mural remains the highlight of your room, free from unsightly defects.
Common causes of wrinkling or creasing
• Moisture troubles: The presence of moisture behind the mural can result in wrinkling.
• Excessive adhesive: Using more adhesive than necessary during installation can lead to wrinkles.
• Environmental impact: The mural might expand or contract due to varying environmental conditions, leading to wrinkles.
Things you will need to fix wrinkling or creasing
• Wallpaper smoother
• Utility knife
• Wallpaper paste or adhesive (for pronounced creases)
Easy-to-follow repair guide
1. Minor adjustments: For shallow wrinkles, employ the wallpaper smoother to push them out, moving towards the mural's edges.
2. Crease repair: For deep creases, make a careful horizontal incision along the crease with the utility knife. Insert some paste or adhesive beneath the cut and smooth it out.
3. Finishing touches: Ensure the cut sections align perfectly and let the adhesive dry thoroughly before any subsequent activity.
How to remove foreign objects from wall mural
Wallpapers are meant to be smooth and pristine, but foreign objects can disrupt this appearance. Proper care and technique can restore your wallpaper to its original look, free from foreign materials.
Common causes of foreign objects on wall mural
• Accidental contact: Objects can be accidentally pressed into the surface over time.
• Installation issues: Debris can get stuck on the wallpaper during installation.
Tools you will need to remove foreign objects
• Tweezers
• Soft brush or cloth
• Wallpaper adhesive or glue (Standard for most wallpapers; vinyl-specific or heavy-duty clear for Vinyl and Fiberglass types)
• Small brush or putty knife (if necessary)
• Clean damp cloth
Easy-to-follow removal guide
1. Object removal: Use the tweezers gently to try and extract the foreign object. Take care to not harm the wallpaper, especially if the object is stuck firmly.
2. Cleaning up: After successfully removing the object, brush or wipe the affected area using a soft brush or cloth to eliminate any remaining particles.
3. Damage control: If the wallpaper's integrity is compromised during the extraction, dab some glue beneath the affected area. Utilize the small brush or putty knife for precise application.
4. Resetting: Carefully realign the wallpaper, ensuring its correct positioning relative to its surroundings.
Frequently asked questions
This section addresses the most frequently asked questions about wall mural repairs and issues, ensuring you comprehensively understand wall mural care and troubleshooting.
Can I paint over wallpaper seams?
Yes, you can paint over wallpaper seams, but it requires preparation to ensure a smooth finish. If the seams are raised or visible:
1. Seal any loose edges with wallpaper adhesive.
2. Sand the seams lightly for evenness.
3. Apply and feather out the drywall or joint compound over the seam.
4. Sand the dried compound for smoothness.
5. Prime the entire wall for uniform paint absorption.
6. Paint with your chosen color.
If you need a separate complete guide on painting over wall murals, this is the best reference out there: How to paint over wall mural
What kind of glue should I use for wall mural repairs?
There are several types of wallpaper repairs available. Always read the product label to ensure the adhesive matches your wallpaper type.
• Paste the wall adhesive: Ideal for modern non-woven wall murals where you apply the paste to the wall instead of the paper. When you order non-woven murals from Photowall, they always come with free glue.
• Clear adhesive: This versatile adhesive is suitable for various wallpapers, accommodating light variants like printed or foiled wallpapers and heavier ones like flocked or textured types.
• Heavy-duty adhesive: Used for wallpapers like vinyl or thick embossed papers.
• Border and seam adhesive: Specifically designed for sealing wallpaper borders or fixing lifting seams.
• Repair adhesive: A stronger adhesive is typically used for small areas where the wallpaper is peeling or lifting.
How to choose a wall mural material for fewer issues?
Selecting the right material and ensuring proper installation can go a long way in minimizing potential wall mural problems. Here are the relevant factors when choosing products to reduce potential issues:
• Easy installation: Mistakes during installation can lead to issues like peeling, bubbles, seams, and gaps. Hence, Photowall offers non-woven and peel-and-stick murals that are easy to install and complemented by sequentially labeled strips. You may check here for a flawless installation: How to install wall mural
• Fade resistance: One hallmark of Photowall's murals is their resistance to fading. Whether it's their standard or premium lines, colors stay vibrant even under sunlight. This helps prevent problems with discoloration.
• Durability & easy maintenance: Photowall's non-woven murals are durable and fire-rated. This durability reduces common issues like tearing and peeling. The easy maintenance of these murals allows for simple upkeep against wear and tear. The peel-and-stick variant is also wipeable, minimizing potential issues with discoloration.
See also: How to choose a wall mural
Final reminders when addressing wall mural problems
As you embark on the journey to restore or maintain the vibrancy of your wall mural, there are a few pivotal points to remember. Addressing issues promptly and with the right knowledge can distinguish between a short-lived mural and a long-lasting masterpiece.
• Proper preparation: Always ensure the wall surface is clean, dry, and primed before installation or repair.
• Use quality materials: Investing in top-notch adhesives, tools, and mural materials pays off in durability and aesthetics.
• Follow manufacturer's instructions: Adhering to the guidelines provided by your mural's manufacturer can prevent many common problems.
• Regular checks: Inspect your mural for signs of wear, discoloration, or damage and address them early.
In wrapping up this comprehensive guide on wall mural problems and solutions, it's clear that with the proper precautions, knowledge, and care, your wall mural can remain a standout piece of art in your space for years to come.