 Australia
 Austria
 Belgium (Dutch)
 Canada (English)
 Denmark
 Estonia
 Finland
 France
 Germany
 Ireland
 Italy
Italy
 Luxembourg (French)
 Netherlands
 New Zealand
 Norway
 Poland
 Portugal
 Romania
 Singapore
 Spain
Spain
 Sweden
 Switzerland (French)
 USA
USA
 United Kingdom
 Other Countries


Learning how to remove wall murals is often the first step in giving your room a fresh, new look. In this article, we will guide you through the step-by-step process of removing wall murals of various types. We'll start with preparing your room and ensuring safety and then delve into specific techniques depending on the material of your wall mural. We will also share some pro tips for a smoother wall mural removal process.
How to prepare for the wall mural removal process
Proper preparation is essential before you start peeling off that mural to ensure a clean and safe removal process. Follow these steps to set yourself up for success.
Step 1: Clear the room
Empty the room of all furniture and accessories to give yourself a clear workspace. If the room can't be entirely cleared, move everything to the center and cover it with a tarp or plastic sheeting.
Step 2: Ensure personal safety
Prioritize your safety by wearing protective gear such as gloves, goggles, and a face mask. This will protect you from any dust or chemical fumes released during the process.
Step 3: Protect floors and electrical outlets
Place drop cloths or plastic sheeting on the floor to catch debris or moisture. Additionally, tape over electrical outlets to prevent accidental water or solvent contact, which could be hazardous.
Removal process for all wall mural material types
The removal technique for wall murals largely depends on the type of material used. Different materials adhere to the wall in various ways and may require specific solvents or techniques. That’s why we’ve categorized the removal guide into categories based on material types, namely (1) peel-and-stick and non-woven wall murals, (2) water-resistant types, (3) fabric-based wall murals, (4) wall murals made of natural materials, and (5) textured varieties.
In each section, we’ll discuss the characteristics of each wall mural material, the steps on how to remove them, and the tools needed to follow the steps.
How to remove peel-and-stick and non-woven wall mural
Peel-and-stick and non-woven wall murals are among the easiest to remove. They are designed for easy installation and removal, usually requiring no more than peeling off the wall mural from the wall, saving you from additional labor costs. Learn how to remove them with these easy steps:
Step 1: Pry the edge
Start at the corner of the wall mural and gently pry the edge using a putty knife. Make sure to start at a spot where the wall mural is already lifting or bubbled to make the initial peel easier.
Step 2: Peel at a 45-degree angle
Once the edge is free, slowly pull the wall mural away at a 45-degree angle. The mural should come off in large strips. Don't pull too hard if you notice resistance; it may damage the wall underneath.
Step 3: Dampen if necessary
If the mural isn't coming off easily, you may dampen it with a sponge and water to ease the removal process. Let the water sit for a few minutes to loosen the adhesive before peeling again.
What tools should you have for removing peel-and-stick and non-woven wall murals?
• Putty knife
• Sponge and water
How to remove water-resistant types
Now, let’s move on to water-resistant wall mural types. These types of wall murals are typically made from vinyl or contain a layer of vinyl coating. These wall murals are more challenging to remove as they resist the penetration of water, which is often used in the removal process. Here’s how you can take them away from your walls:
Step 1: Score the wall mural
Use a wall mural scoring tool to make small cuts or perforations in the wall mural. This will help any solvent you use to penetrate through the water-resistant layer.
Step 2: Apply a removal solution
Mix a wall mural-removal solution or use a 1:1 mixture of vinegar and water. Apply generously to the scored areas with a sponge or spray bottle, letting it sit for 15-20 minutes.
Step 3: Scrape off the wall mural
After allowing the removal solution to soak in, use a putty knife to scrape off the wall mural. Start at the edges and work your way inward.
Step 4: Repeat if necessary
If the wall mural proves stubborn, you may need to reapply the removal solution and repeat the scraping process.
What tools should you have for removing water-resistant types?
• Scoring tool
• Wall mural-removal solution or a mixture of vinegar and water
• Sponge or spray bottle
• Putty knife
How to remove fabric-based wall murals
Fabric-based wall murals usually consist of a layer of fabric attached to a paper backing. This type of mural can be difficult to remove due to the dual layers, which may require different removal techniques for the fabric and the paper backing beneath it. Here’s a guide to make your removal process simpler:
Step 1: Separate the fabric from the backing
Try to peel the fabric layer away from the paper backing. You can use a putty knife to help initiate the separation. If the fabric doesn't separate easily, lightly moisten it with water or a wall mural-removal solution to make the process easier.
Step 2: Remove the paper backing
After removing the fabric layer, you'll likely have the paper backing still adhered to the wall. Dampen this layer with a sponge or spray bottle filled with a 1:1 mixture of vinegar and water or a commercial wall mural-removal solution. Allow it to sit for 15-20 minutes.
Step 3: Scrape off the paper backing
Using a putty knife, carefully scrape away the paper backing. Work your way from the edges toward the center.
What tools should you have for removing fabric-based wall murals?
• Putty knife
• Sponge or spray bottle
• A mixture of vinegar and water or a commercial wall mural-removal solution
How to remove wall murals made of natural materials
Wall murals made of natural materials such as grasscloth or bamboo are often unique in texture and appearance. However, these materials can be challenging to remove, as they are porous and can tear easily, complicating the process. The safest way to remove them is provided here:
Step 1: Test a small area
Always begin by testing a small, inconspicuous area to determine how the material will respond to removal efforts. This step can help you avoid damaging the wall or mural during removal.
Step 2: Cut into sections
Use a utility knife to cut the mural into smaller sections, about 1 foot wide. This makes it easier to handle the material and may reduce tearing.
Step 3: Apply a removal solvent
Due to their porous nature, natural materials may respond poorly to water-based solutions. You may need to use a specialized wall mural-removal solvent. Apply it to a small section and wait for it to soak in before proceeding.
Step 4: Gently peel and scrape
After the solvent has had time to soak in, start at one edge and try to peel off the mural. You may need to use a putty knife to assist in the process. Exercise caution to avoid tearing the material or damaging the wall.
What tools should you have for removing wall murals made of natural materials?
• Utility knife
• Specialized wall mural-removal solvent
How to remove textured varieties
Textured wall murals can include embossed designs or other raised elements that give them a three-dimensional appearance. These murals present their own challenges during removal, as the textured surface can make it difficult for removal solutions to penetrate effectively. The best way to remove them is through these steps:
Step 1: Score the surface
Use a wall mural scoring tool to create perforations on the textured surface. This will help your removal solution to seep in and work more effectively.
Step 2: Apply removal solution
Apply wall mural removal or a 1:1 mixture of vinegar and water onto the scored areas. Use a sponge or spray bottle for even coverage, and allow it to sit for about 20 minutes.
Step 3: Begin peeling
Start at one corner and try to peel off the wall mural. You may need a putty knife to assist in this process, especially if the textured elements make it difficult to get a good grip.
What tools should you have for removing textured varieties?
• Scoring tool
• Wallpaper-removal solution or a mixture of vinegar and water
• Sponge or spray bottle
• Putty knife
How to finalize your wall mural removal: Post-removal wall care
Once you have successfully removed your wall mural, some important steps must be taken to ensure your wall is in the best possible condition. Whether you plan to paint, re-apply a wall mural, or decorate the wall in another way, these final steps are crucial.
Step 1: Inspect and repair the wall
Inspect the wall for scratches, holes, or damage. Fill minor flaws with spackling paste and sand smooth. For larger damages, cut and patch with new drywall or apply multiple layers of spackle, sanding between each. Ensure all repaired areas are sanded smooth before proceeding to the next steps.
Step 2: Remove glue
A warm water and dish soap mixture can be effective for lighter glue. Apply with a sponge and scrub gently. For more stubborn adhesive, consider using a specialized wall mural stripper according to manufacturer instructions. Always test any chemical strippers in a small area first to ensure they won't damage the wall. Here’s the most complete guide on how to remove wall mural glue.
Step 3: Wash the wall
Thoroughly wash the wall with a sponge and mild detergent to remove any lingering adhesive or glue. Removing all glue is important to ensure that your paint or new wall decoration will adhere properly.
Step 4: Prime the wall
Apply a coat of primer to prepare the wall for painting or apply a new mural. This will help provide a smooth and uniform surface. Using a primer also ensures that the wall absorbs the paint evenly, making your new color look its best.
Step 5: Paint or decorate
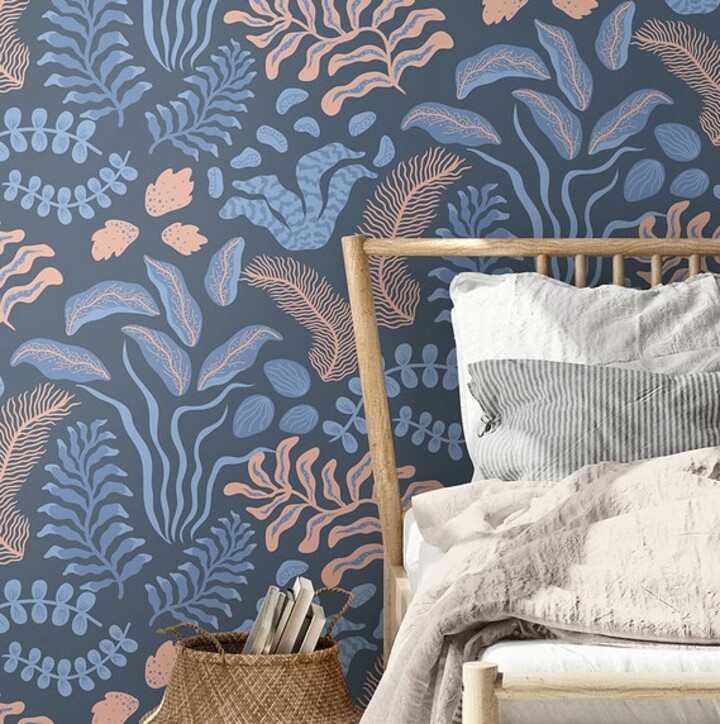
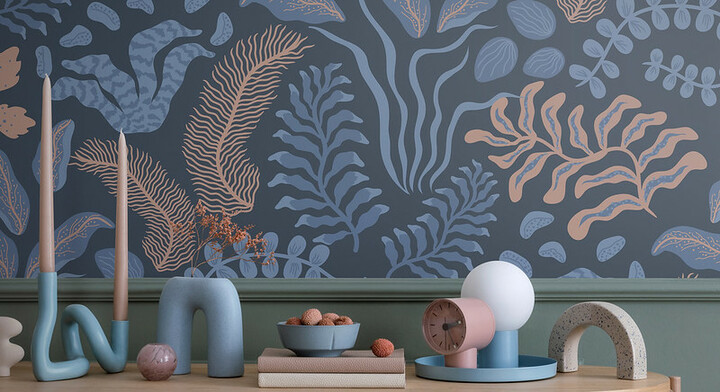
PWP Wonder Garden Herbal Poise IV
The dos and don'ts of removing wall murals
Navigating the intricacies of wall mural removal? This set of dos and don’ts will help streamline the task while minimizing potential damage. Find pro tips and mistakes to avoid in this section as well.
Do's
• Select removal-friendly types: Prioritize wall murals like peel-and-stick or non-woven types for hassle-free removal later. Photowall offers an extensive range of DIY-friendly wall mural options that are easy to install and remove.
• Utilize fabric softener: Especially useful for older murals, a mix of fabric softener and hot water can loosen stubborn glues. Spray and let sit for 15-20 minutes.
• Consider a wall mural steamer: Another way to deal with old wall murals is through a steamer. Steam is a helpful way to loosen the adhesive, making the paper easier to peel or scrape off.
• Test first: Always try your removal method on an inconspicuous wall section to ensure it's both effective and safe.
Don’ts
• Avoid chemicals without caution: Chemical wall mural removers work well but should be used carefully. Always follow the safety guidelines provided by the manufacturer.
• Don't rush multi-layered walls: When you find multiple layers of wall mural, remove the top layer first and assess each subsequent layer for the best removal strategy.
• Don’t use sharp and abrasive tools: Such tools can cause unintentional damage to the walls, resulting in scratches or gouges. This can lead to extra work and expensive repairs. Instead, choose safer options like scrapers or putty knives with smooth edges.
• Don’t force the wall mural off: This may damage the wall surface or leave behind stubborn glue. Always allow sufficient time for the removal solution or steam to penetrate and soften the wall mural.
By adhering to these dos and don'ts, you're better positioned to remove wall murals efficiently without undue hassle. Looking for redecoration ideas for your bare walls? Find tips and inspiration in this comprehensive guide: how to choose wall mural