 Australia
 Austria
 Belgium (Dutch)
 Canada (English)
 Denmark
 Estonia
 Finland
 France
 Germany
 Ireland
 Italy
Italy
 Luxembourg (French)
 Netherlands
 New Zealand
 Norway
 Poland
 Portugal
 Romania
 Singapore
 Spain
Spain
 Sweden
 Switzerland (French)
 USA
USA
 United Kingdom
 Other Countries


When it comes to the task of figuring out how to remove wall mural glue, many find themselves scratching their heads. This seemingly simple endeavor can become quite a chore if not approached correctly. This article is subdivided into three main parts: (1) the preliminary steps, (2) the actual steps, and (3) the post-cleanup steps of removing wall mural glue. It will also answer some commonly asked questions and provide tips in the dos and don’ts section.
The preliminary steps: Things to do before removing wall mural glue
Before diving into the actual removal process of the wall mural glue, there are some vital steps you need to undertake to ensure a smooth and safe operation. These preliminary steps are designed to protect your space and belongings and ensure your personal safety.
Clear the room
Starting with an uncluttered space is essential. By removing furniture, decor, and other items from the room, you'll have ample space to maneuver and protect your belongings from potential damage or contamination. This will also make it easier for you to access the entire wall surface without hindrance.
Cover the floor and furnishings
Even with the room cleared, protecting your flooring from potential spills, drips, or other glues is important. Lay down drop cloths, plastic sheets, or old newspapers to catch any accidental spills. Cover large furniture pieces that can't be moved out of the room with tarps or plastic sheeting to shield them from potential damage.
Ensure electrical safety
Before starting the removal process, turn off the electricity in the room, especially if you're near outlets or switches. Also, cover all electrical outlets and switches with waterproof tape to prevent water damage and potential electrical hazards. You may also use non-conductive tools and wear rubber-soled shoes for an added layer of safety.
Check on your personal safety
Ensure the room is well-ventilated, especially when using solvents or chemicals, to avoid inhaling toxic fumes. Safety eyewear can protect your eyes from splashes, while gloves protect your hands from irritants.
The actual process: Two methods of removing wall mural glue
Now that you've taken the necessary preliminary steps to ensure a safe and efficient working environment, you're poised to dive into the actual removal process. Here, we're offering two tried-and-true methods to assist you in getting rid of that persistent wall mural glue. Depending on the tools you have on hand and the severity of the adhesive glue, choose the method that best suits your needs.
Method 1: Using a homemade solution
For those who prefer a more natural approach or are in a pinch without a commercial adhesive remover, this DIY method is both eco-friendly and effective.
Things you will need
• White vinegar or baking soda
• Warm water
• Spray bottle
• Soft brush or sponge
• Clean rags or towels
Guide
1. If using white vinegar, fill the spray bottle with a mixture of equal parts vinegar and warm water. If opting for baking soda, make a paste by mixing it with a little water.
2. Apply the solution to the affected area. If using the vinegar solution, spray generously. If using the baking soda paste, spread it over the glue with a sponge.
3. Allow the solution to sit for 10 to 20 minutes.
4. Gently scrub the area with a soft brush or sponge in a circular motion.
5. Wipe away the glue and the solution using a clean, damp rag.
6. Rinse the area with clean water and dry it with a towel.
Method 2: Using a commercial adhesive remover
This method leverages the power of specially formulated adhesive removers to break down and dissolve the wall mural glue, making it one of the most effective techniques for stubborn glues.
Things you will need
• Commercial adhesive remover (available at most hardware stores)
• Spray bottle (for easy application)
• Plastic scraper or putty knife
• Clean rags or towels
• Warm water
• Mild detergent or soap
Guide
1. Fill the spray bottle with the commercial adhesive remover.
2. Spray the affected areas generously, ensuring even coverage.
3. Allow the solution to sit for the time specified on the product label – typically, 5 to 15 minutes.
4. Gently scrape off the softened glue using the plastic scraper or putty knife. Work in one direction to prevent spreading the adhesive further.
5. Once most of the glue is removed, clean the area with a mixture of warm water and a mild detergent or soap.
6. Rinse with clean water and wipe the walls with a clean towel or rag.
The post-cleanup process: Things to do after removing the wall mural glue
Once the glue is removed, ensuring a thorough post-cleanup process is essential to maintain the integrity of your walls and ensure they're prepared for future decorations or treatments. Let's delve into the steps you should follow after the primary adhesive removal.
Clean the walls
Even after the glue is gone, residual solvents, detergents, or DIY solutions might be left on the wall. Using a mixture of mild soap and warm water, gently scrub the walls with a soft sponge. This ensures any leftover chemicals are washed off and helps restore the wall's natural texture and appearance.
Dry the walls
Properly drying the walls is essential to prevent mold growth or water damage. Using a clean, dry towel, pat down the wet areas. For faster drying, consider using a fan or dehumidifier, especially in rooms with limited ventilation. Ensure the walls are completely dry before proceeding to any redecoration.
Check for sticky spots
Sometimes, tiny patches of adhesive might get overlooked in the initial cleanup. Run your hand over the wall to feel for any sticky spots. If found, refer back to the earlier removal methods and treat those specific areas.
Remove tape and tarps
With the walls clean and dry, carefully remove any protective tape, tarps, or plastic sheeting you placed during the preliminary steps. Ensure you dispose of these materials properly, especially if they're soaked in adhesive removers or other chemicals.
Commonly asked questions on removing wall mural glue
Countless queries have arisen surrounding the topic of wall mural glue removal. Below, we address some of the most frequently asked questions, aiming to clear up any doubts and guide you further through this often daunting process.
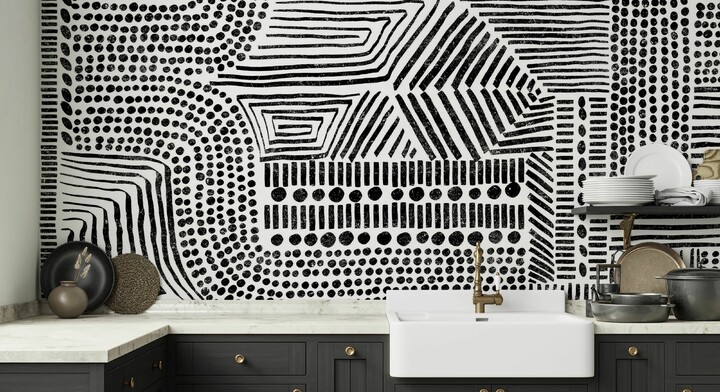
What type of wall mural is best to avoid glue problems on the wall?
When looking to sidestep the challenges of stubborn glue, it's advisable to opt for wall murals that use a peel-and-stick adhesive backing. These murals are not only easier to apply but also to remove, leaving minimal glue.
Photowall’s peel-and-stick wall murals has a self-adhesive backing that effortlessly adheres to walls, and it does not need any paste or glue, making the installation and removal straightforward. When it's time to redecorate, these wallpapers require no professional skills, just like their non-woven counterparts.
Can I paint or apply a new mural immediately after removing the glue?
While the excitement to redecorate is understandable, it's crucial to wait until the wall is thoroughly clean and dry before applying paint or a new mural. Any leftover glue or moisture can negatively impact the adherence of the new paint or mural. Typically, it's recommended to wait at least 24 hours, but this can vary based on the condition of the wall and the ambient environment. Here’s a complete guide on how to install wall mural: How to install wall mural
The do's and don'ts of wall mural glue removal
To make the journey smoother, we've prepared a concise list of do's and don'ts. Adhering to these pointers will help ensure efficiency in your wall decorating process.
Do's
• Test a small area first: Before applying any removal method to the entire wall, test a discreet spot to ensure no damage or discoloration occurs.
• Read product instructions: If using a commercial adhesive remover, always follow the manufacturer's guidelines for optimal results.
• Stay patient: Let glue removers sit for the recommended time to penetrate and soften the glue fully.
Don'ts
• Avoid over-saturation: Whether using water, vinegar, or commercial products, avoid soaking the wall, as excessive moisture can damage it.
• Don’t use metal scrapers: These can gouge or scratch the wall. Instead, opt for plastic scrapers or soft cloth.
• Avoid immediate redecoration: Allow the wall to dry and settle before painting or applying a new mural.
Discovering how to get glue off walls from wallpaper or wall murals might seem tricky at first, but with the right steps, it's totally doable. Just stick to the guide, choose a suitable method, take note of the tips, and remember the do's and don'ts. Take it step by step, stay safe, and enjoy the fresh, clean look when you're finished. If you’re not sure how to start redecorating your walls after removing the wall mural glue, here’s your ultimate guide to choosing a wall mural: How to choose a wall mural